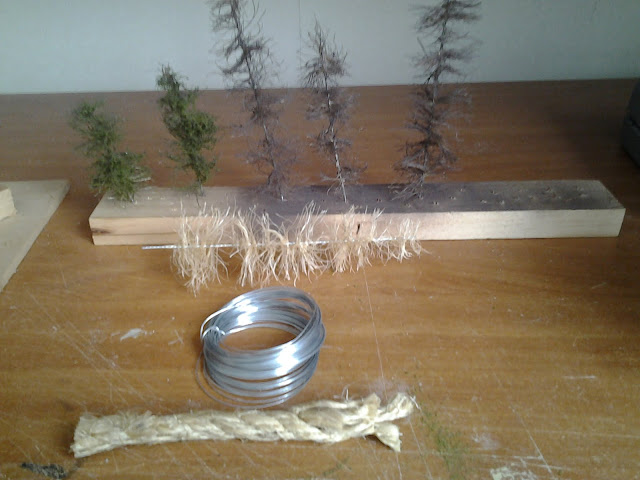
So in an effort to save cash I decided to have a crack at making my own trees.
Really simple. All you will need is some rope, thin gauge wire, brown spray paint, ground foam, hairspray and an electric drill.
1. Bang a nail into a fairly stable piece of timber;
2. Nip the head off of the nail. (be careful here else you will pierce your hand if you forgot you did it)
3. Cut off a length of wire and fold it around the nail once, so it is effectively folded in half, separate the two pieces of wire.
4. Pull your rope apart and snip off bunches of strands with a pair of scissors. You don't need to undo these bunches too much; lay them between the two lengths of wires wrapped around the nail.
5. Shove the ends of the wire in the drill and press the trigger gently. The wire should spin around, taking the rope with it and get tighter and tighter. When it's tight enough that the rope is all splayed out in individual fibers you can undo the chuck and slide the wire off of the nail.
6. Take your scissors and trim your tree into as natural a tree like shape as possible.
7. Spray all your trees evenly with a fine coat of brown spray paint.
8. Once the paint is dried, spray your trees with hairspray and sprinkle ground foam over them and voila! a tree is born.
Saturday, 3 September 2016
Tuesday, 10 May 2016
Ballasting Completed
Time for a quick update.
This job, that of ballasting, has taken several months; done in between a bit of this and a bit of that.
As you can see, I went with a blended grey courtesy of Woodland Scenics. I researched this for quite awhile and in the end just went with what I liked the look of, rather than anything prototypical.
While I was doing this I also installed some street lights, ones which look much better than what I have on the overpass; so one of my next jobs is to replace them! Ugh...
Currently I am onto the next bit of track-work, which is painting the rails, something which I decided to do after taking some close up videos of moving trains.
The shiny silver look of the tracks looked completely unrealistic when viewed from that angle. You can see some of the track I have painted on the left and I think you will agree, it looks way better. So over the next couple of weeks I will do the rest.
All going to plan, my next post will include be a video of a loco actually moving.
Subscribe to:
Posts (Atom)